Thursday, March 22, 2012

Meet Your Beets!

Even though veggie share deliveries will not start for another couple of months, work has already begun at the farm. I thought you'd enjoy seeing some of the progress. 

Introducing...your beets (if you're a veggie subscriber)!  Because the weather has been so incredibly warm, I decided to go ahead and start seeding a few things outdoors. I couldn't resist. Usually, I've waited until April to do this, but April weather seems to have arrived in mid-March. It will be months yet before the average last frost date comes & goes, but things like beets, spinach, scallions & carrots are cold hardy and can take the cooler nights (and, with some row cover, even a light snowfall or two). 

This is just the first planting of these veggies. They will get seeded again and again throughout the season so that we have a supply throughout the summer.
 
Weeds have started to arrive with a vengeance over the last couple of weeks. Many of the weed seeds arrived with the manure that was added to the beds last fall. Even though it means weeding work, their appearance does mean that the manure wasn't contaminated w/ evil pyralid herbicides (something that is becoming disturbingly common). Soooo yeah...weeds are good, right?? Remind me of that in a couple months :-).  


I experimented last fall and insulated my spinach & parsley beds with thick straw and several layers of row cover fabric. I wanted to see if I could get them to survive the winter.  


A couple of days ago, I uncovered them, and voila!! Live parsley, spinach & even some wayward scallions (don't know how those got there...maybe I dropped a seed packet last fall? Can't remember. I'm happy to see them though :-). The scallions look yellow because they apparently would've appreciated being uncovered sooner. Who knew so much was happening under all of that straw?

I also noticed the tiniest of green sprouts just starting to show in the garlic bed that was planted last fall. 


In the "basement greenhouse," things are happening as well. The peppers are just beginning to peek up and say hello! (sorry the pic is blurry). Tomatoes will be getting started shortly, along with a long list of other garden veggies. They will progress out to the real greenhouse at the farm once a heater can keep up with the nighttime temps. 

The pleasant daytime temperatures sure are a nice switch from last Spring's chill that seemed to stick around forever. Seeding beets & carrots is so much more pleasant in 70 degree sunshine.

If you are thinking about signing up for a share, but haven't yet, there are still a few available. 

I'll continue to keep you posted on the fun things that are growing and happening up at the farm!


Wednesday, February 1, 2012

Badger Rock Farm's 2012 CSA Program

Do you love fresh, locally grown vegetables, but struggle to find the time or the energy to grow your own garden? Badger Rock Farm's Community Supported Agriculture (CSA) program might be the answer for you. If you choose to subscribe, you will receive a weekly “share” box (or ½ box, for smaller households) of freshly picked, in-season produce for the duration of the growing season. 

If you would like more variety, you may add local honey, eggs from Badger Rock Farm's pasture-raised, organically-fed laying hens, and/or pasture-raised, organically-fed broiler chickens to your season's share.

For details, click on the "2012 CSA Program" link that is up above, right under the farm's name!

Sunday, January 22, 2012

What We Eat...And The Light It Craves

Preface: I write this little column for Roundup's local paper, the Roundup Record, each month. It is called "What We Eat....". Thought I'd post it here as well.


December 21, 2011 at 10:30pm was the moment that those of us residing within Mountain Standard Time experienced this winter's solstice, when the sun was at its southernmost point in the northern hemisphere's sky. It also marked the year's shortest day and longest night.

Since that moment in time, our days have been getting progressively longer, something that is significant to those of us that miss the sunshine of summer. It is not just sun-starved humans that mark the lengthening days, however. Plants notice as well.

For plants, light is necessary for life because it drives photosynthesis, the process by which plants' cells convert sunlight into food. For many plant species, day-length (or, more accurately, the length of uninterrupted darkness), is as much a trigger for the processes of seed germination, growth, flowering, fruit development, and the onset (or release from) winter dormancy as is the warmth of spring. Many plants will not grow at all, even in the presence of sufficient heat, when day lengths are shorter than 10 hours. For example, a southern gardener that writes for the periodical Growing for Market, observed that radishes sown during the winter in her greenhouse (which provided adequate warmth in that mild winter climate), were much slower to mature than radishes planted during the longer days of late spring or early fall. The radish variety she planted in early September took 29 days to come to fruition. Planted in November, the same variety took 77 days, and in late January, it took 65 days.

A plant that is triggered to flower when days are less than 12 hours long is described as “short-day.” Plants that form flowers and go to seed quickly when days stretch past 12 hours in length are “long-day.” If a plant is not responsive to day length, it is “day-neutral.” A number of commonly known garden plants are long-day. Consider, for example, the abundant leaves of lettuce and spinach during the shorter days of early spring, and their haste to flower and go to seed when summer days become long. Onions, too, are so notoriously sensitive to day length that most seed catalogs categorize varieties according to their short-, long-, or day neutral preferences.

As January draws to a close, and February approaches, our days' lengths are already gaining momentum. They will continue to do so until the summer solstice occurs on June 20, marking the longest day of 2012. And while it still might feel like winter has us in its grip, we can be encouraged because the ever-shortening nights are, even now, doing their greening work on the plant-life of our frozen landscape and our gardens. 

Sunday, January 15, 2012

Badger Rock Farm Veggie Share Newsletter - Week # 20

YOUR WEEKLY FARM UPDATE

Week #20 is upon us. I can hardly believe it has been 5 months since you began receiving your veggies! What a season it has been. I am very grateful for your patience and good humor as I have worked my way through the learning curve that's been the first year of this veggie share program. I hope that you have enjoyed it. This week brings with it some of the traditional fall veggies, such as root crops (onions, radishes, parsnips and some Jerusalem artichokes), and winter squash. Also included are basil and fennel. Here's hoping that this winter treats all of us kindly. If you expressed interest in participating in 2012's veggie share season, I will get in touch with you in the latter part of the winter with details. Thanks again....it has been my pleasure working with you this summer!!

WHAT'S IN YOUR BAG

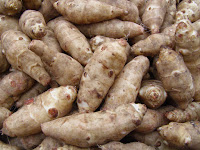
Jerusalem Artichokes & Onions – Also known as sunchokes or sunroots, these tuberous veggies are in the sunflower family (the plant that grows from them looks similar to the familiar sunflower) and are native to North America, having been cultivated by Native tribes long before European settlers arrived on this continent. Opposite what their name suggests, they are not actually artichokes at all, and they are not connected with Jerusalem. Early explorers compared their flavor to artichokes, however, and it is believed that that is how that portion of the name came to be. The Jerusalem reference might have come from the Italian word for sunflower: girasole. Over time, the word is guessed to have morphed into Jerusalem, and it stuck. They can be used similarly to potatoes (though they will not keep as long), and can be eaten raw in a salad if sliced thinly. They may also be steamed and eaten, or used in soups. Here is a recipe, that also uses the onions in your bag, to try:

Cheesy Artichoke Soup
1 lb Jerusalem artichokes
2 tbsp lemon juice
2 stalks celery
1 medium onion
6 tbsp butter
2 ½ cups chicken broth
3 tbsp flour
1 ½ cups cheddar cheese
2 tsp dry mustard
½ cup cream
1 tsp Worcestershire sauce
salt, to taste
Cayenne pepper, to taste

Wash, and roughly chop Jerusalem artichokes and keep in water to which lemon juice has been added until ready to use (to prevent browning). Chop celery and onion and cook in 2 tbsp of the butter until slightly wilted, approx 10 minutes. Add the artichokes and 1-1/2 cups chicken broth to your pan, cover, and cook for 10 to 15 minutes or until they are cooked through. Puree in a blender or food processor. In a medium-size saucepan, melt 4 tbsp butter, add flour, and cook for 2 minutes without browning. Remove from heat and whisk in 1 cup of the broth, then cook for another 5 minutes. Add the cheddar cheese and mustard and stir until blended. Stir in your artichoke mixture and cream and cook until soup is heated through. Season with salt, cayenne pepper, and Worcestershire sauce.

Parsnips – As you might guess from their appearance, parsnips are relatives of the more familiar carrot. Ideally, it is harvested after more exposure to freezing temperatures, as the cold causes some of the vegetable's starches to convert to sugars, making it sweeter. Our 90 degree September/October has been short on cold, so you can store your parsnips in your fridge for a week or so (in a plastic bag in the crisper to keep them fresh) to duplicate cooler fall temps. You don't have to do that to enjoy them, however. To prepare parsnips, you can peel them, shred and add them raw to a salad. Or you can chop and steam them, as you might a carrot. They can also be shredded and sauteed with a little bit of olive oil and water until they are tender. You can even make “fries” out of them by peeling and slicing them into fry-shaped pieces. Put them into a bowl with some olive oil, salt and pepper and stir them around until they are coated in oil. Place them on a baking dish and bake at 450 degrees, stirring every 10 minutes or so to prevent burning, until browned and crispy (but not burned). Enjoy!

Fennel & Radishes – The fall crop of radishes are continuing to come on strong. Fennel is the feathery, dill-looking, licorice/anise-flavored item in your share this week. Here is a recipe that combines the fennel and the radishes:

Fennel & Radish Salad with Lemon Dressing
1 tbsp lemon zest
2 tbsp lemon juice
1 apple, peeled, cored and diced
1 stalk fennel, sliced
½ lb radishes, sliced
Salt and pepper to taste
4 tbsp yogurt
2 tbsp cream cheese
1 tsp sugar
1 clove garlic, crushed
In a medium bowl, whisk together cream cheese, yogurt, lemon juice, lemon zest, sugar and garlic. In a salad bowl, combine apple, fennel and radishes. Season with salt and pepper to taste. Toss with the lemon dressing and serve.

Pumpkins & Carnival Winter Squash – There are several varieties of winter squash in your share this week. The yellow, white and green squash are Carnival squash. The mini pumpkins are Mary Jane Beadle's Wee-B-Littles. They can be painted up for Halloween, or prepared as you would any other winter squash (baked with some brown sugar, butter and maple syrup, pureed for pie, etc). The larger pumpkins are the New England Pie variety, which—as their name suggests—are ideal for making pumpkin pies. I would suggest allowing the pie pumpkins to sit for a couple of weeks to cure. I have been trying to push them to ripen, and I believe that they are mostly there, but I still think they could use some counter-time before preparation. Pickyourown.org has good directions on how to make a pumpkin pie from scratch. Here is how they suggest to achieve puree from your pie pumpkin (or other winter squash). Once you have the puree, you can use it in your favorite pumpkin pie recipe.

Cut your pumpkin in half, and remove the seeds as well as all the stringy material that is in the seed cavity. A heavy ice cream scoop can come in handy for this job. (Save those seeds for roasting!! Directions for that are also on pickyourown.org, or elsewhere on the web). Cut off the pumpkin's stem, and place the halves into a microwaveable bowl (or quarters, if necessary to get them to fit), put a couple of inches of water in the bowl, cover and microwave for 15 minutes on high, and then in smaller increments of time, checking to see if the flesh is soft enough to be scooped out. You can also steam the halves (or quarters) for 20-30 minutes, or bake them at 350 degrees for 45 min – an hour. Whichever method you use, once the pumpkin is cooked, you can easily scoop the flesh out of the rind with a spoon. If you notice water standing in the scooped out pumpkin flesh, you can allow it to sit for half an hour or so, and then drain it off. Then, blend using either a hand blender or regular blender and, voila, you have pumpkin puree, ready for your pie recipe! If you are not ready to use it right away, you can freeze it for use later in the year. 

Badger Rock Farm Veggie Share Newsletter - Week # 19

YOUR WEEKLY FARM UPDATE

This week marks your nineteenth veggie share. It is also the first one of the fall season, the last one that will come in September and the second to last one of 2011. As I thought might happen, the garden did take a frost last Tuesday night. It got colder than I guessed it would...I had many things covered, but some of the tomatoes partially froze right through their covers. Hard to imagine, given the almost immediate bounce of the temperatures up into the nineties! Happily, this summer-like weather has allowed for the surviving veggies (there were many) to continue to ripen. The squash fared mostly alright under double layers of fabric, and are in your bag this week. Rutabagas are also there. Radishes and beets are making a comeback appearance, and a couple of familiar items such as purple basil and tomatoes (albeit green ones....great for fried green tomatoes!) are also present. Enjoy!

WHAT'S IN YOUR BAG

Rutabagas

A member of the Brassica genus, rutabagas are related to veggies such as turnips, cabbages, broccoli, kohlrabi, kale, cauliflower, mustards and more. A root crop that can take moderate frosts, it has been present in root cellars for centuries. In Britain and Ireland they have historically been carved, instead of pumpkins, at Halloween. Here is a recipe for your rutabaga:

Mashed Rutabagas

2 lbs peeled rutabagas, cut into large chunks
cold, salted water
3-4 tbsp butter
a pinch of nutmeg

Put the chunks of your peeled rutabagas into a pot of cold, salted water and bring to a boil. Simmer until they are very tender (approx 30-40 minutes). Drain rutabagas, return them to the pot and heat gently for 2-3 minutes to dry them. Mash with a potato masher or fork. Work in the butter and nutmeg. Adjust seasoning to your taste and serve.

Radishes – Radishes are back! Of course, they are yummy raw. But if you prefer them cooked, here is a recipe:

Glazed Radishes
½ lb radishes, trimmed
½ tbsp butter
½ tsp sugar
¼ tsp salt
¼ cup water

In a heavy saucepan wide enough to hold the radishes in one layer cook the radishes in the butter with the sugar and the salt over moderately low heat, stirring, for 1 minute. Add 1/4 cup water, simmer the radishes, covered, for 10 to 15 minutes, or until they are tender, and boil them, uncovered, shaking the pan occasionally, until the liquid has been reduced to a glaze. Cook the radishes over moderate heat, swirling them, until they are coated with the glaze and serve!

Sweet Dumpling Winter Squash


Baked Sweet Dumpling Squash
1 Sweet Dumpling squash
1/8 cup butte
2 tsp honey (substitute brown sugar or maple syrup if desired)
1/8 tsp salt
1/8 tsp pepper

Cut squash in half lengthwise and remove seeds. Place squash, skin sides down, in a baking dish and add 1 tbsp. butter and 1 tsp. honey into the cavity of each squash half. Then, sprinkle squash evenly with salt and pepper. Add water to baking dish to a depth of approx 1/4 inch. Bake, covered, at 400° for 30 minutes; uncover and bake 15 more minutes or until squash is tender.

Beets – Beets are back too! You have a combo of regular red beets, and chioggia beets, which look like a target (alternating red and white stripes) when cut. Here is a recipe from Marquita Farm's website (chock FULL of wonderful, simple veggie recipes) that is perfect for these hot, Indian summer days we've been having:
Simple summer beet soup
Boil and peel your beets. Whirl them in a food processor with orange or lemon juice, a small amount of fresh mint leaves if you have some, and black pepper. Chill. Serve with plain yogurt or sour cream.

Green Tomatoes – The frost really set back the ripening process of the tomatoes. I think the plants are still somewhat alive and will probably continue to vine-ripen more tomatoes. But they certainly aren't hurrying along. Therefore, this week might be the perfect week for a fried green tomatoes recipe (also from Marquita Farm). If you're not into green tomatoes, you can allow them to ripen on your counter (or in a brown paper bag). They'll turn red and juicy over time.
Fried Green Tomatoes
3-
4 medium sized green tomatoes
3/4 cup fine cornmeal
3-4 tbsp vegetable oil
salt & pepper
Green Chile Mayonnaise (recipe below)

Slice the tomatoes crosswise 1/3 to 1/2 inch thick. Press each piece into a plate of cornmeal and coat on both sides. Heat oil in a wide skillet over high heat until hot enough to sizzle a drop of water. Add tomatoes, reduce heat to medium and fry on both sides until golden. Remove to plate, season with salt and pepper. To make Green Chile Mayonnaise: Add several minced and seeded jalapeños or other hot peppers to 1 cup mayonnaise.

Badger Rock Farm Veggie Share Newsletter - Week # 18

YOUR WEEKLY FARM UPDATE

As of the writing of this newsletter (Tuesday evening, 9/20), the garden has so far escaped a hard frost. Only narrowly though. And the forecast calls for 37 degrees tonight. That doesn't leave much buffer above that freezing threshold. Row cover fabric (in double layers) is protecting some of the more sensitive plants, so I'm hoping that we'll get a bit more out of them before the year is out. Still to come, for at least one (or maybe two) more week(s), are the veggies that can resist light freezes (root crops, for instance). This week, you have some of the familiar warm weather veggies such as cukes, summer squash, tomatoes and peppers (though their quantity wasn't as impressive this week), while they last. New additions are mini melons and spaghetti squash. Recipes below!

WHAT'S IN YOUR BAG

Spaghetti Squash, Tomatoes, Sweet Peppers & Basil

Spaghetti squash are truly unique because their flesh resembles spaghetti noodles when cooked. It makes a great substitute for actual noodles (and a way to work an extra veggie into pasta recipes) in any dish that calls for them.

The tomatoes are reallllyyy slowing down their ripening because of the cold nights. Pretty depressing since I feel like they'd only just started to ripen at all! I've added some semi-ripe ones to your bags so that you could get some tomato volume. Leaving the not-quite-ripe ones on your counter for a couple of days should turn them red and juicy for you. Not quite as good as vine-ripened, but I guess we'll have to take what we can get this year.

Spaghetti Squash, Veggies & Feta
1 spaghetti squash, halved lengthwise & seeded
2 tbsp oil
1 bell pepper, chopped
1 onion, chopped
1 garlic clove, minced
1 ½ cups tomatoes, chopped
¾ cup crumbled feta cheese
3 tbsp sliced black olives
2 tbsp fresh basil, chopped

Preheat oven to 350 degrees F. Lightly grease a baking sheet and place your spaghetti squash cut sides down on the sheet. Bake 30 minutes, or until a sharp knife can be inserted into the squash easily. Remove squash from oven, and set aside until cool enough to handle. While the squash is cooling, heat oil in a skillet over medium heat. Saute the onion in oil until it is tender. Add the garlic and bell pepper, and saute for 2 to 3 more minutes. Stir in your tomatoes, and cook only until tomatoes are warm (don't overcook). Use a large spoon to scoop the stringy pulp from the squash, and place it in a medium bowl. Toss with the sauteed vegetables, feta cheese, olives, and basil. Serve warm.

Mini Melons – I have tried to grow melons in previous gardens, only to be disappointed when frost came calling and they were still unripe. This year, I planted mini melons, as they were supposed to ripen sooner. I believe that has happened and that they are ready for your enjoyment. Included is a mini watermelon and a mini musk melon and/or cantaloupe. Cut open and prepare as you typically would a watermelon or cantaloupe.

Cucumbers (regular & lemon)– The cucumbers are still hanging in there, though (like the tomatoes and other hot weather veggies) they are feeling the effects of the cold nights and are slowing their production. They are now tucked in under a layer of row cover fabric, so hopefully they'll be protected from any light freezes and maybe (maybe) we'll get a few more cukes before the plants succumb to jack frost.


Patty Pan Summer Squash – Patty pans are a summer squash, but when they get larger like this, you can bake them....much as you would a winter squash. Here is a recipe:
Baked Patty Pan Squash
1 medium to large pattypan
2
tbsp melted butter
2
tbsp parmesan cheese
6 leaves fresh basil, chopped
1
tsp rosemary
S
alt to taste
Slice pattypan squash into ¼ inch thick sections and remove any tough parts, i.e. stem area and base.
Brush the bottom of a baking dish with a coating of melted butter then layer in the following order one quarter of each of the ingredients: slices of squash, brush a layer of butter, salt, basil, rosemary, and parmesan cheese. Repeat with 3 more layers. Pour any remaining butter over top. Bake at 400 F for 20-25 min or until the squash is tender throughout. Remove from oven, scoop, serve, enjoy!

Badger Rock Farm Veggie Share Newsletter - Week # 17

YOUR WEEKLY FARM UPDATE

This is the seventeenth week of your veggie shares, and it is starting to feel a bit like fall out there....especially in the chilly evenings and early mornings. Thankfully, we have (so far) been spared a frost, so summer veggies (like tomatoes and peppers) continue to produce. After the late arrival of summer temperatures, a warm fall is always desired (by me and the heat-loving veggies). I hope that we get one this year. But if a frost comes calling, there are still some veggies that will fare alright and be available for next week's share. Cabbage is one of them that you'll get to enjoy this week.

WHAT'S IN YOUR BAG

Tomatoes, Sweet Peppers & Basil

Bow-tie Pasta Salad
1 lb bow-tie pasta
2 tbsp olive oil
1 red bell pepper (or a couple of small red peppers), stemmed, seeded & cut into matchsticks
2 cups small tomatoes, halved or quartered
1 cup olives, pitted and halved
1 cup fresh mozzarella, shredded
1 garlic clove, minced
2 tsp balsamic vinegar
1 tsp salt (or to taste)
1 tsp freshly ground black pepper
¼ cup Romano cheese, grated
¼ cup Parmesan cheese, grated
½ cup fresh basil leaves, shredded

Bring a pot of water to boil. Add pasta and cook until done and drain. Pour pasta into a serving bowl and toss with 1 tbsp of the olive oil. Add the peppers, tomatoes, olives, mozzarella and garlic. Toss to combine. Add the remaining tbsp of olive oil, the balsamic vinegar, salt and pepper, cheese and basil. Toss to combine and serve.

Cabbage – I am sure you will notice the small stature of the cabbage. I've been watching them for weeks, waiting for them to get larger. But then, one cracked, which told me that the size I saw was probably all the size I was going to get. These poor cabbage plants have been through a lot between the hail storms early this spring, the rains that brought on the flooding, and then the immediate switch to sweltering dry heat. I really think soil fertility is the biggest culprit here....a problem that will be remedied next spring with extra helpings of compost. Until then, however, I hope you enjoy your mini cabbage and onions :-).

Cabbage and Onions
1 small – medium head green cabbage, sliced
1 onion, sliced into ribbons
1 clove garlic, chopped
1 tsp caraway seed
paprika to taste
1 tbsp olive oil (or as needed for sautéing)
salt & pepper to taste
Sauté the onion in the oil first, then add the cabbage. Stir thoroughly. Simmer for approx 20 min, stirring occasionally. Then stir in the garlic, salt, pepper, paprika and caraway seed. Continue cooking until the cabbage is tender (approx another 10-15 min). Great as a compliment to baked potato or polish sausage.


Lemon Cucumbers – The slicing cucumbers seem to be on their way out. The lemon cucumbers, named for their resemblance to the familiar sour fruit, continue to perform like champs. Several of you have told me you enjoy them, so here are a few more for your palate's pleasure. Enjoy and prepare as you would regular cucumbers.


Tomatillos & Hot Peppers – Even though it is delicious, there are other ways to prepare tomatillos besides making them into salsa verde. Here is one:
Tomatillo Guacamole
3 avacadoes, peeled, pitted & mashed
3 tomatillos, husked & chopped
1 red onion, finely chopped
3 plum (or roma) tomatoes, seeded & chopped
1 tbsp lime juice
¾ tsp hot pepper, finely chopped (or to taste)
2 drops hot pepper sauce (or to taste)
salt to taste
In a medium bowl, mix avacado, tomatillos, onion, tomatoes and lime juice. Stir in chopped hot pepper, hot pepper sauce and salt. Cover and refrigerate at least 45 minutes before serving.